What is Winter Sowing?
Monday begins the 26 day long Blogging From A to Z Challenge. My theme is The A to Z of Winter Sowing. It's a simple theme, photos of seedlings A to Z growing in their winter sown containers.
I thought it might be a good idea to set the stage by explaining what winter sowing is. And isn't.
The isn't is simple. It isn't sowing seeds in the ground in winter, or sowing seeds in winter that can grow in the colder weather.
The USDA defines winter sowing as, "A propagation method used throughout the winter where temperate climate seeds are sown into protective vented containers and placed outdoors to foster a naturally timed, high percentage germination of climate tolerant seedlings.”
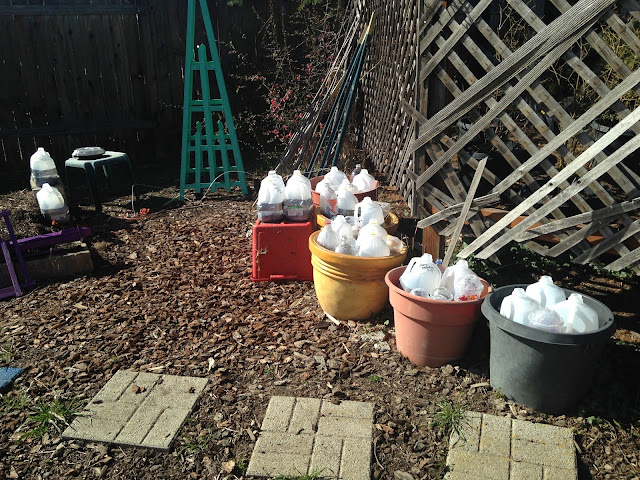
It's sowing seeds in winter (I start in late December, and no later than mid-February, but your winters might last longer) in containers that are sealed up, forming little greenhouses with open tops to let in rain or snow. Seeds know the best time to germinate, and this allows them to pick when. Once you've sown the seeds, sealed the containers (no lids!), you put them out in the elements and leave them alone. Unless you have a dry spell, they will not need tending. Resist the temptation! They can be ignored.
The method (and name) was invented by Trudi Greissle Davidoff of New York more than 20 years ago. The materials she used are still the best and most widely read about online.
*empty milk jugs (the opaque kind)
*sharp scissors or utility knife
*potting soil (not seed starter mix)
*duct tape
*weatherproof labels or markers
*seeds appropriate for winter sowing (more about that below)
Milk jugs are the perfect "protective vented containers." Deep enough for root growth. Small enough to handle. An open top to let in rain and snow, or to water if you need. Easily cut with plain scissors. Thin enough to seal with duct tape.
The first step is to ignore the complicated instructions you find on too many blogs! You do NOT need to heat a nail to poke drainage holes. You do NOT need to ask your husband (as if only men can handle a power drill) to drill drainage holes. You do NOT need to use a power drill yourself. You do NOT need to measure and draw a line around your milk jug to make it straight.
These are milk jugs. They are trash (or recyclables). They will be filled with soil. They will have duct tape around them. You will NOT be judged for having crooked jugs. They will NOT be on display. That is, unless you are an "influencer" and need them to be picture perfect. If you aren't, the method is simple, and quick.
Here I am using an ordinary pair of scissors. I fumbled some, it is usually quicker. Under 30 seconds per jug. Poke holes in the bottom and low sides. Cut round leaving a "hinge," a bit below handle level.
Add your seeds to the depth recommended on the package. Or if you saved your own seeds, check online for planting depth. Add something to remind you of what you planted. Otherwise you will forget and your jugs will be mixed up. Even labeling I've mixed them up!
Then shut the jug, seal up the cut crack with duct tape. I use the Dollar Tree brand, I find it works better than the Duck brand. I write a number on the outside (use something weatherproof or you'll never know what's in what jug!), and a document on the computer of what number is what. You can also add a weatherproof label inside, old window blind slat pieces work well. Pencil works better than even a permanent marker.
Set it out in the elements. It will be fine. Even if it freezes. Even if it snows.
Once they start growing, and the weather has some sunny days, you can open the jugs to let the seedlings get some light. Don't forget to close them back up at night if frost is in the forecast. Some of these below are ready to be transplanted into the garden.
Transplant when conditions are right. Another "isn't" to winter sowing is it isn't a method to get plants into the garden sooner. It is a method to have healthy, sturdy transplants ready to go out without the necessity of hardening off.
Do not let the seedlings get too big! You will see photos online of plants peeking out the top. These should have been transplanted long before that. You may have a clump of seedlings. If able, you can separate them, but Trudi just plants them that way, or cuts them into smaller clumps.
What seeds work?
Any that say they need stratification (or suggest refrigeration before sowing). Any seeds that are said to be "hardy," perennials or annuals. If you wait long enough you can even winter sow vegetables like tomatoes, although those I do start in the house.
If you don't have milk jugs, many other containers will work. I like plastic 2 liter soda bottles for plants with long tap roots. Some plants seem to like the green plastic! I don't bother with clamshell deli containers, they don't hold enough soil in my opinion. Nor do I like foil baking pans with clear plastic lids. The lids crack when you try to poke holes, and the foil bottom is very wobbly if you have to move it.
For April I have winter sowing successes from A to Z! It's not too late to join in the annual blogging event, link is in the first sentence.
Come back Monday for A is for Anise Hyssop!


Interesting topic. I'll be interested to see where it leads you...
ReplyDeletePeople get way too precious with things like that. Make the cuts perfect. The holes have to be so many inches apart. Etc. I'm with you on keeping it simple.
ReplyDelete